BackyardRC
A practical approach to RC planes
Category Archives: BackyardRC
Ground Control to Major Tom

Check out our YouTube Channel!
If you haven’t done so already, take a look at our YouTube Channel. It is filled with build videos, flight footage, and a ton multimedia odds and ends. One of our more popular videos is our Ardupilot telemetry synced with FPV video. Check it out HERE and if you enjoy it please let us know with your subscription!
Home Sweet Home

BackyardRC’s new home workshop
It might not look like much but we’ve started moving in today. Now it’s time to organize, clean, add a workbench, and get back to the real work of building!
Say goodbye to the old kitchen counter builds

BackyardRC’s New Home!
We are sorry that there has not been any posts for the better part of a month but during this time we’ve moved! BackyardRC has taken up residence in an old garage in central Pennsylvania getting us one step closer to a true workshop! Over the next few weekends we’ll be unpacking, setting up our gear, building storage and a sweet workbench. We’ll be sharing the process along with getting back into regular posts of all that DIY RC goodness you crave soon!
Thanks!
-Mark
One man’s junk is another man’s treasure. – Quadcopter build continued

Finished Quardcopter Airframe
Late last week (before the F22 CAD craziness) I continued the build of the new quad. It went fairly straight forward and smoothly. I used an old CD case as a base of the build. Scavenging old hardware and spare parts I added no cost the build. The airframe build time came in just under 2 hours.

Discarded CD case to house all the electronics and Ardupilot
First round of bolts and everything is rock solid.

A motor mount made a great lower brace
A big part of the DIY ethnology is reusing old stuff in new and innovative ways. It much like the old saying: One man’s junk is another man’s treasure.

The power distribution board on the lower level
With the board centrally mounted there is still a ton of room to run the motor, ESC, and battery leads. But this if going to require a bit of cutting through the deck of the CD case.

Ardupilot and RX on the upper level
I am really happy with the outcome. The CD case turned out to be a great clean compact base to build upon. I still need to come up with an anti-vibration solution for the Ardupilot. Please post any ideas in the comments below.

Everything fits under the CD case lid

Looking good!
Next up is all the wiring of motors and ESCs. With any luck the first flight will be only a week or two away 🙂 The real question will be will it lift my GoPro?!?
Follow the full build process from the beginning:
- Part One: Quadcopter Crazy
- Part Two: Motors, Mounts, and Arms
- Part Three: One man’s junk is another man’s treasure
- Part Four: Quadcopter Build Goes 3D
Rebuild F22 CAD files underway
Last night I continued some of the work on the fully customized F22 CAD files. All the easy parts are completed. Now to build out the sides and motor mount. Who knows I might even get creative and build in the servos and linkage.
Beware of who you trust…

6mm RC F22 Plans
For months now I have been planning to load the 6mmFlyRC F-22 plans into my favorite CAD program and play around with the design. And today I did just that.
What I found was quite amazing. The airframe is horribly lopsided. The dimensions lack any consistency in symmetry from the left to the right. It’s as if the designer free-handed the whole plane. I’m really disappointed in 6mmFlyRC. I know they give their plans away for free but that is no reason to half-ass the design.
I guess I’ll just have to draw up my design from scratch…. As always I’ll share my design and work as it progresses.
I best crack open another beer and fire up a clean Solidworks file.
Motors, Mounts, and Arms

The HobbyKing Gear!
The HobbyKing order arrived today. Time for some quick unwrapping and building.

RotorBone meet Park300
The RotorBone mounts aligned great to the bolt pattern on the motor. The included screws were a bit short and should be replaced with longer ones. In due time.
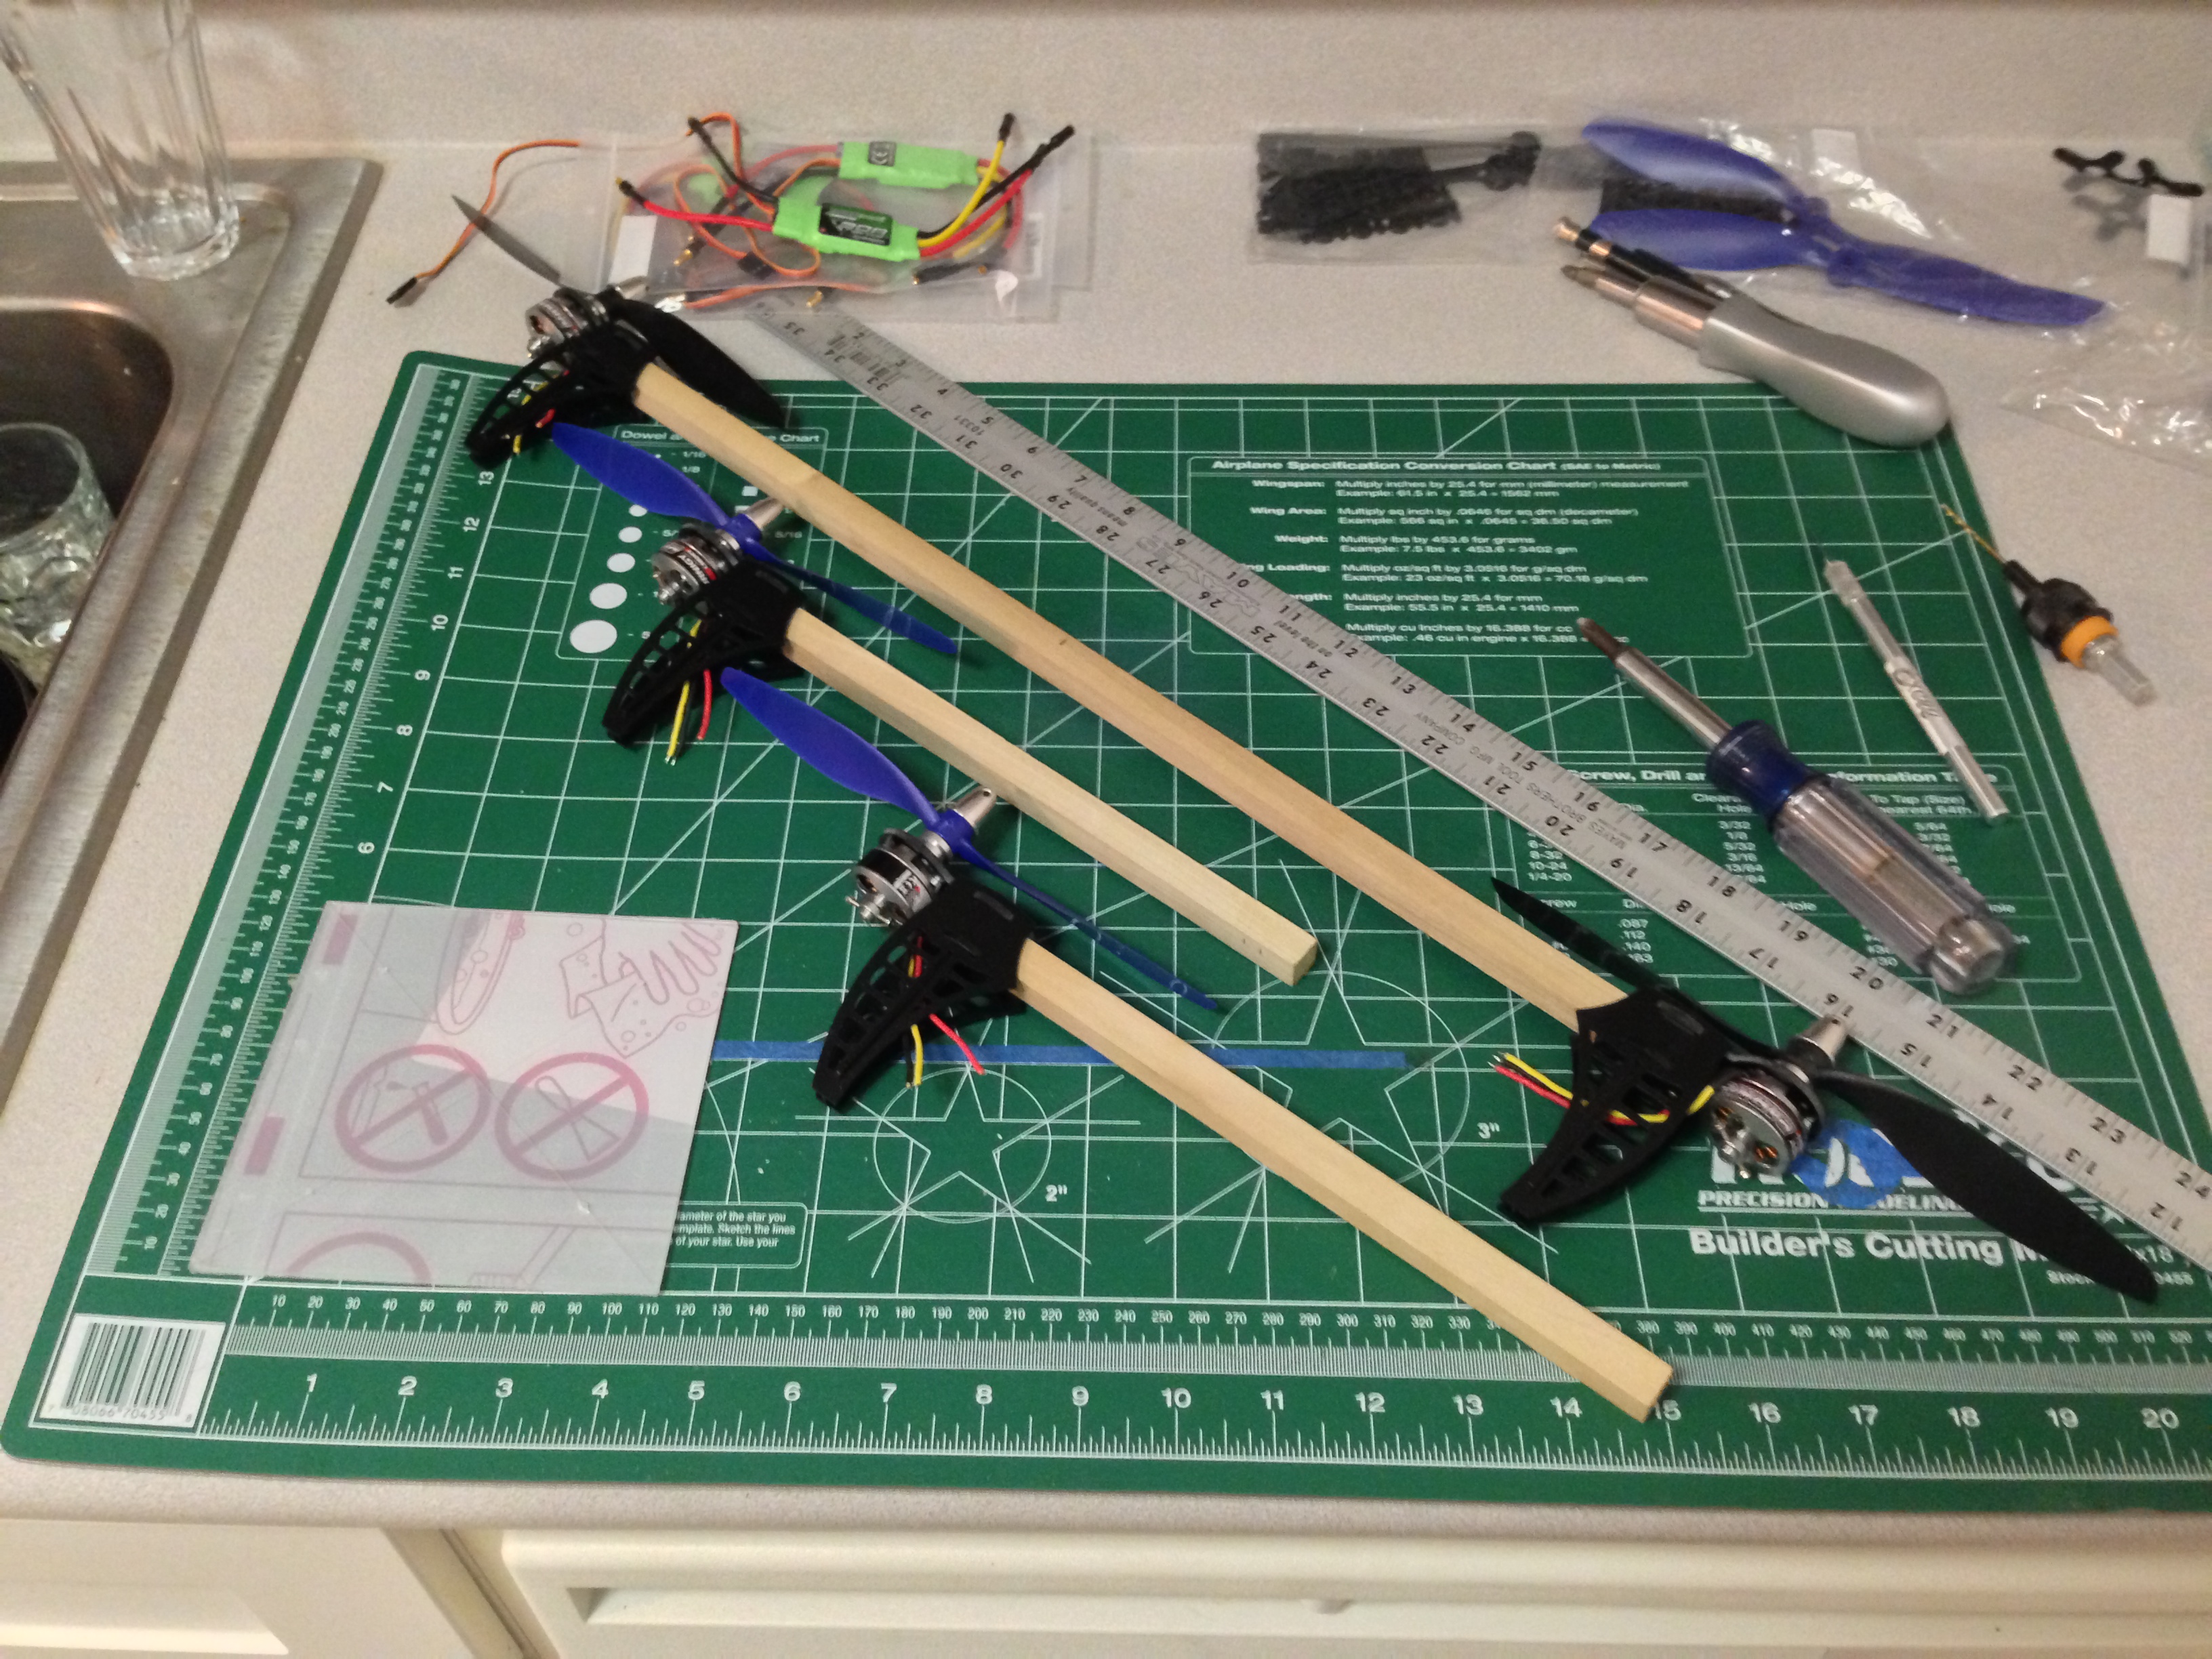
Quadcopter Arms
It only took about 30 minutes to bolt up all the motors and to cut the lengths of wood.
- 1 – 20 inch for the main arm
- 2 – 9 3/4 inch for the secondary arms
- 1 – 5″ x 5″ plexiglass square (main deck)
Tomorrow I’ll continue with the build focusing on completing the airframe. It should be interesting to see how everything turns out. I am not using plans and more or less making it up as I go along. Stay tuned.
Follow the full build process from the beginning:
- Part One: Quadcopter Crazy
- Part Two: Motors, Mounts, and Arms
- Part Three: One man’s junk is another man’s treasure
- Part Four: Quadcopter Build Goes 3D
Rotorbones

RotorBones!!
The new Flite Test Rotor Bones quadcopter mounts arrived today!

What comes in the box
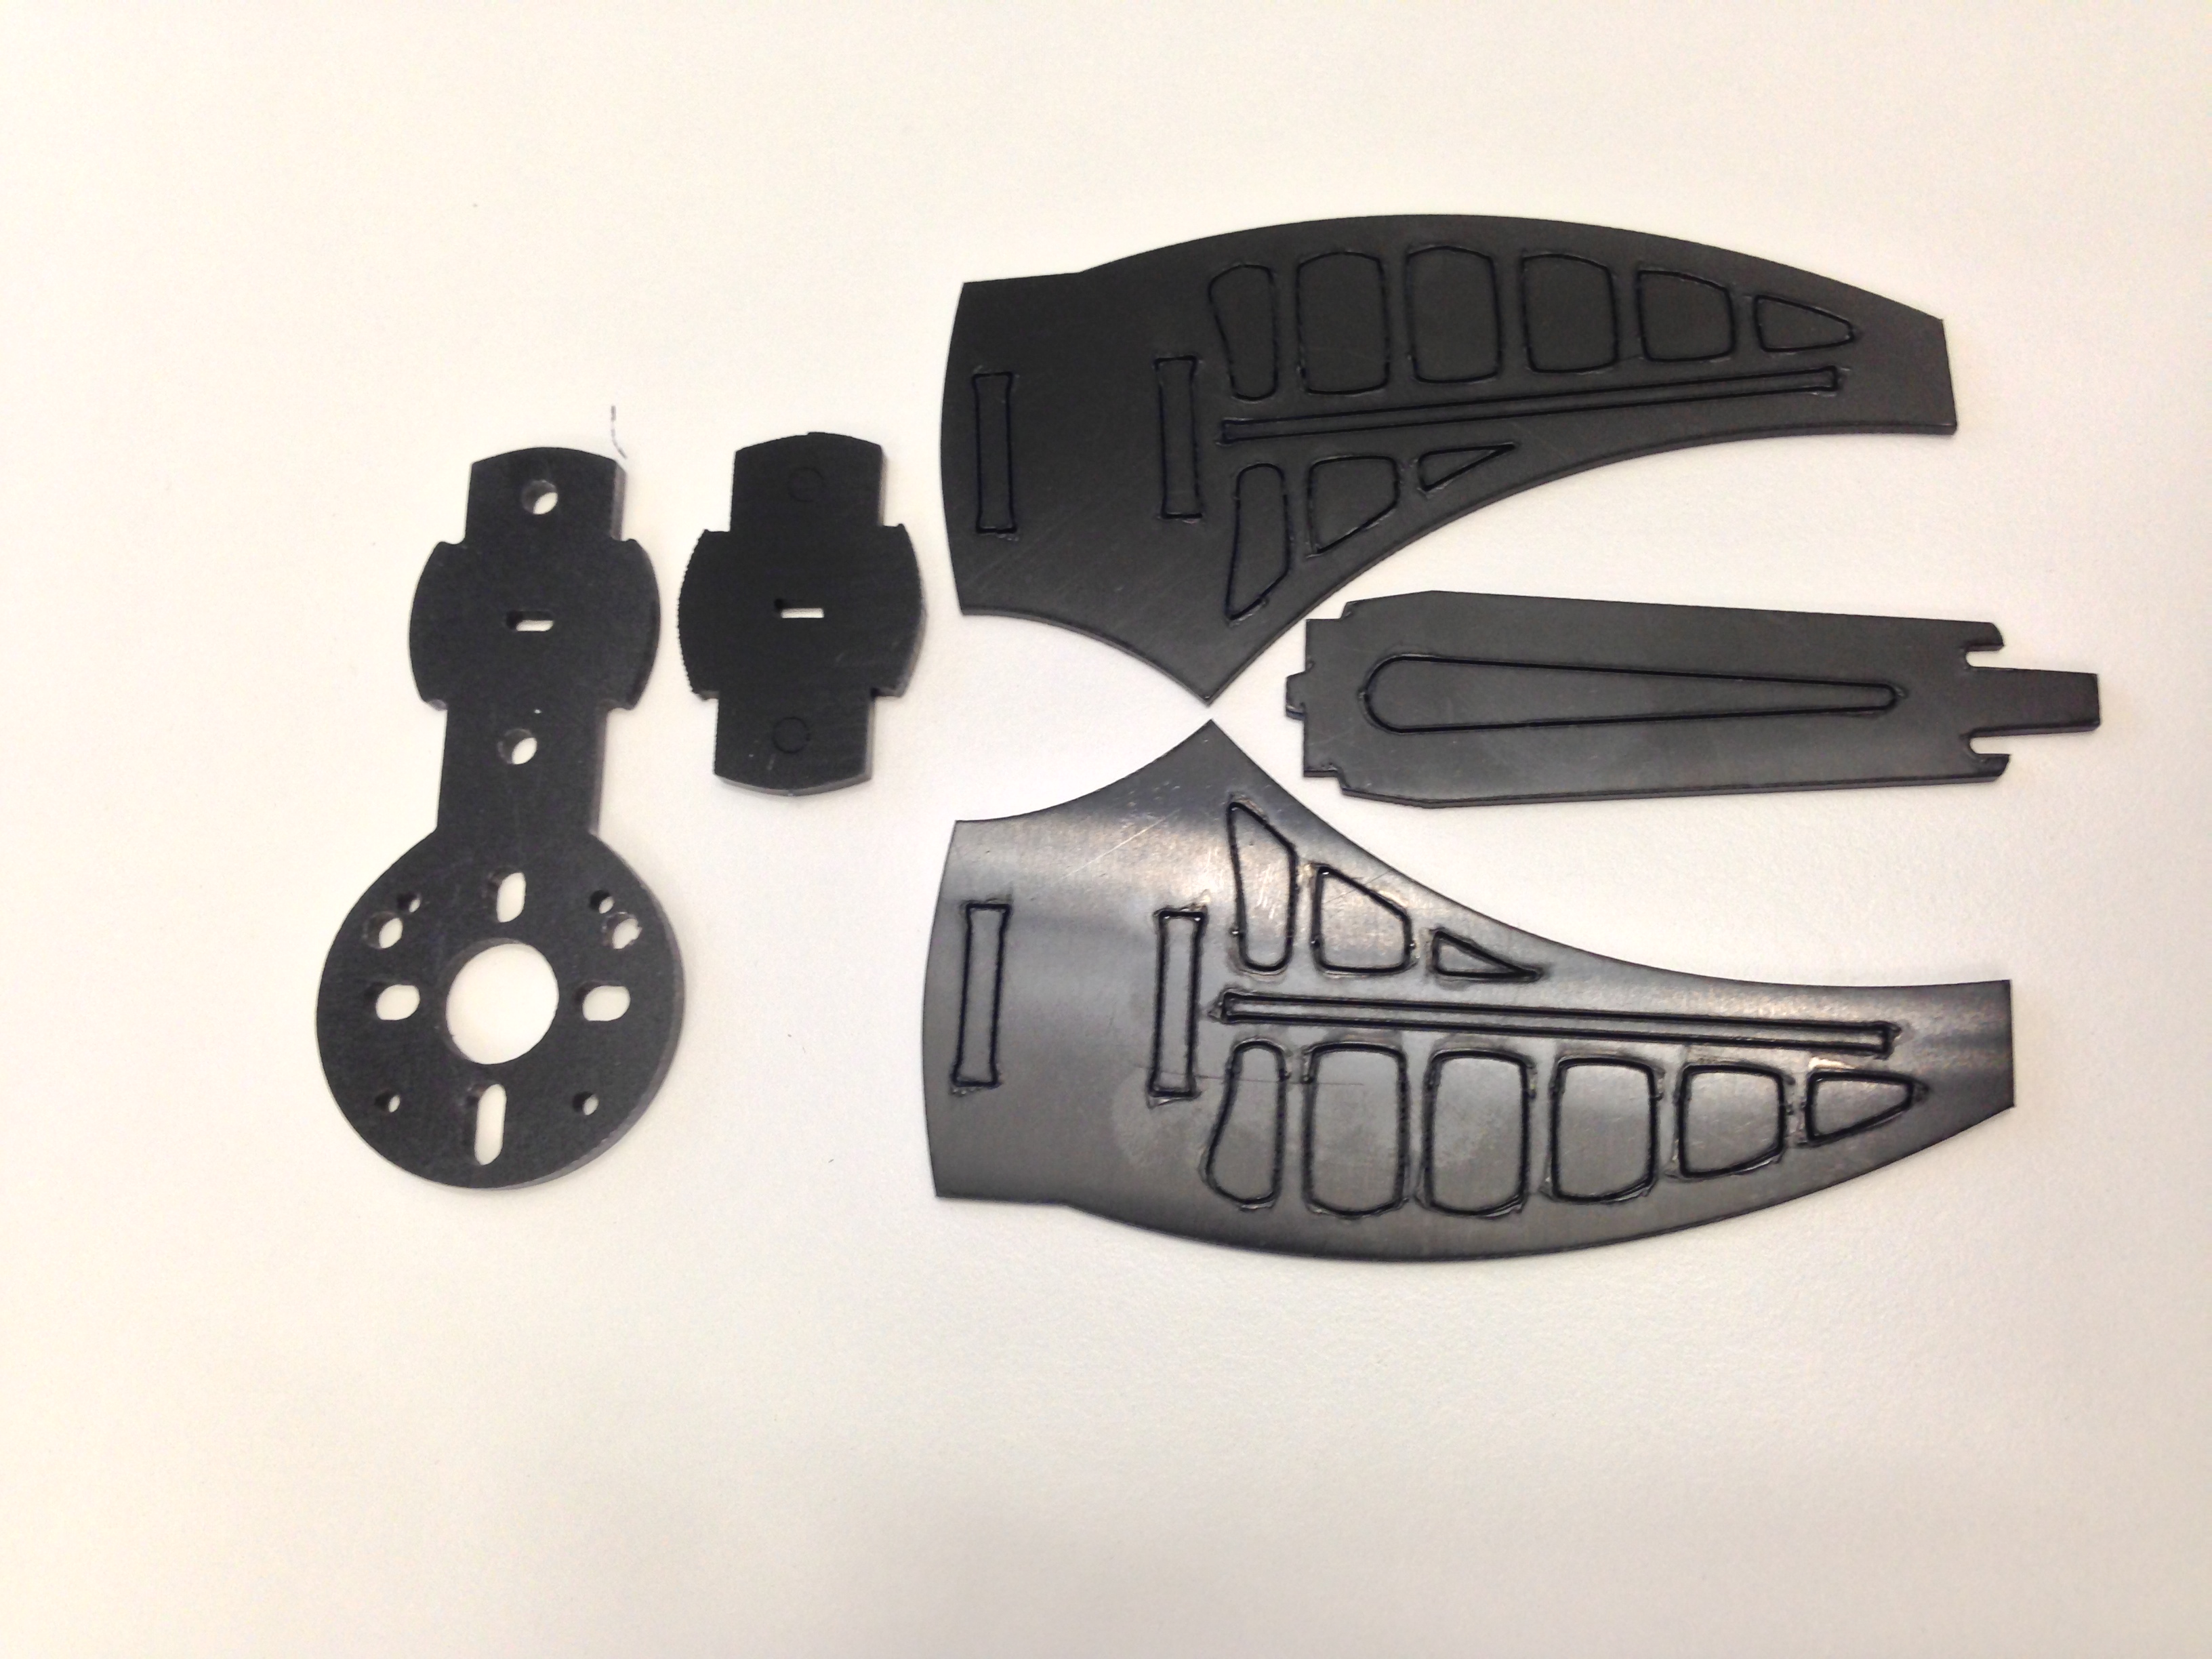
Removed Parts
It only took about 10 minutes to have all four put together.

The finished assembly looks great!
Can’t wait for the rest of the gear to arrive from HobbyKing!!
Quadcopter Crazy

Arducopter!
I didn’t want to sink too much money or time into my first quad. Everyone knows there is a bit of a learning curve and the first new airframe is bound to get a bit thrashed. And in typical fashion I have a hard time spending a small pile of money on airframe designed for the masses that might only fit about 1/2 of my needs. Plus DIY is always more fun.
Over the next few posts I’ll document my build process and highlight challenges and failures. In the end I hope I can help straighten the learning curve a bit for others.
So here is the plan: Build a simple quadcopter around 8×4 props and HobbyKings Park 300 motor. I’m hoping to build a solid quad to carry my GoPro. I am also going to use the arducopter flight system as training wheels much like I did when getting into RC planes.
What I purchased:
- 4 x HobbyKing’s Park300 1380kv motor – ($13.44 x 4 = $53.76)
- 4 x Turnigy Multistar 30 Amp Multi-rotor Brushless ESC – ($11.61 x 4 = 46.44)
- 1 x SlowFly 8×4.5 props (2 standard rotation; 2 counter) – ($2.79)
- 2 x pair FliteTest new quadcopter motor mounts – ($18 x 2 = $36)
- 1 X HobbyKing’s Quadcopter PDB – ($3.99)
Total cost: $142.98
As soon as all of the gear arrives I’ll start the build. Stay Tuned!!
UPDATE:
Follow the full build process from the beginning:
- Part One: Quadcopter Crazy
- Part Two: Motors, Mounts, and Arms
- Part Three: One man’s junk is another man’s treasure
- Part Four: Quadcopter Build Goes 3D
A hard lesson in CG

A few weeks ago a 747 cargo plane crashed just after takeoff at Bagram Airfield in Afghanistan. The cause has been determined to be shifting cargo.
Shortly after takeoff the cargo broke free, shifting to the rear of the plane. The sudden shift in weight drastically changed the flight characteristics.
But there is a lesson we can directly apply to RC flight. Knowing and checking your Center of Gravity (or CG) can drastically change the behavior of your model.
A tail heavy plane will want to pitch up, causing lost lift and stalls. Depending on the stall characteristics of your plane there might not be a way to catch it.
In the video you can see this very thing happen. The weight shifts to the rear, the plane slows, pitches up, looses lift, and then stalls completely. Wing tipping hard to the right, the pilot tries to level her out but all forward momentum is lost.
A great rule of thumb when in doubt fly with a slightly nose heavy plane. This will cause the nose to want to drop and speed the plane up. The increased speed will cause increased lift counteracting the nose down motion. An easy method of balancing RC airplanes is to place the tips of your index or middle fingers under each wing, exactly on the line of the CG. A correctly balancing rc airplane, sitting on your fingertips, will either be level or have the nose pointing slightly downwards.

Remember to always check the plane in its flight ready configuration. Loaded with all batteries, RX, camera, and cargo
Remember to always check your CG before flight. After each flight process the planes behavior and adjust the CG for the next flight. An iterative adjustment process will lead the to best flight experience.
Good luck and wheels up!

Recent Comments